Tuesday, September 27, 2011

comfort food and Milk Gravy


When I think of the word comfort food, so many yummy images comes to mind. Mac and cheese, chicken noodle soup, baked steak, smashed potatoes, and pot pie to name a few. Oh my golly my mouth is drooling. :0)
I was blessed to have been raised in West Virginia. A place where you never meet a stranger and the women are crazy amazing cooks. My Mother was raised in a small town on the border of West Virginia and Virginia. During Bluefield's hey day it was the hub of the Southern coal fields. My Grandparents  cooking style was a combination of southern and Appalachian. My Grandmother could bake up a storm. My Granddaddy was know for his rolls. I am convinced their food had such wonderful flavors because they cooked with lard.


To quote Wikipedia, " Lard is pig fat in both its rendered and unrendered forms. Lard was commonly used in many cuisines as a cooking fat or shortening:" I know your stomach is not happy right now and your face is all scrunched while saying "ewwwwww". Mind you this is before trans fat, saturated fat and any other fat. I can tell you that lard made the most amazing dinner rolls. 


I have been really sick so maybe that is why I have been craving my Mother's and Grandmother's dishes. Recently I was craving gravy. Not just any gravy. More specifically, cube steak milk gravy. But how would it taste gluten and casein free? I gave it a try using white rice flour and almond milk original. I was uncertain if white flour would thicken like regular flour. I was pleasantly delighted. :0) Now I am a pro again at milk gravy, i have found that I love brown rice flour in my milk gravy. Every once in a while I will even spoil Jeff and make it the "other way" with milk and white wheat flour. He told me the other day how wonderful my sausage gravy was. SHhh don't tell him it was GF and CF! Hee Hee Hee

May your table be bountiful~blair


Spanish Rice

Until recently any kind of Hispanic food has remained off my menus. Suddenly my family loves it. Emily feels it is certain to her beginning Spanish this year! Anyhoo, this must have been good because I ran out. Always a good sign. I think I will incorporate Spanish Rice more often. The ingredients are almost always on hand. This recipe can be found here


"Spanish rice, a delicious accompaniment to steak, chicken, and Mexican entrees such as tacos or    enchiladas. Spanish rice is prepared by browning the rice first with onions and garlic, before cooking it in chicken stock with added tomato. The browning is essential to the nutty, almost toasty flavor of the rice. And although bouillon can be substituted for the chicken stock, nothing beats homemade chicken stock, the rich flavor of which is absorbed by the rice." For the vegetarians that I have living at my house (cough, couch, Sarah Elizabeth and Heather :0) I use veggie stock.
Ole!
May your table be bountiful~Blair


Spanish Rice Recipe

  • Prep time: 5 minutes
  • Cook time: 25 minutes

INGREDIENTS

  • 2 tablespoons olive oil (can use up to 1/4 cup)
  • 1 onion, chopped fine
  • 1 garlic clove, minced
  • 2 cups of medium or long-grain white rice
  • 3 cups* chicken stock (or vegetable stock if vegetarian)
  • 1 heaping tablespoon tomato paste or 1 cup of diced fresh or cooked tomatoes, strained
  • Pinch of oregano
  • 1 teaspoon salt
*Check the instructions on the rice package for the proportions of liquid to rice. They can range from 1:1 to 2:1. If your rice calls for 2 cups of water for every cup of rice, then for this recipe, use 4 cups of stock for 2 cups of rice.

1 In a large skillet brown rice in olive oil, medium/high heat. Add onion and garlic. Cook onion rice mixture, stirring frequently, about 4 minutes, or until onions are softened.
2 In a separate sauce pan bring stock to a simmer. Add tomato sauce, oregano, and salt. Add rice to broth. Bring to a simmer. Cover. Lower heat and cook 15-25 minutes, depending on the type of rice and the instructions on the rice package. Turn off heat and let sit for 5 minutes.
Yield: Serves 4
** I double this recipe for my family. If we have company I triple the recipe! Don;t worry it will be eaten.**

Sunday, September 25, 2011

Crock pot Applesauce

Our new house has nice size back yard and is surrounded by ...surprise, evergreen trees! Our neighbors on the other hand have been blessed with apple trees, red and transparent apples. My neighbor across the street, Pat, shared some of her transparent apples. Oh my golly, they made amazing applesauce! I had never made applesauce before, holly cow was it easy and yummy.
I took half of the batch camping with us over labor day with our friends the Smyer Family. Our first morning Rebekah served an insane amount of eggs and bacon to feed the masses. Between her family and our there were 12 in all. I served my apples as a side dish. Everyone thought it was apple pie filling! The large mason jar was empty before the bacon was all gone! :0)

The next door neighbor, Heather, has 2 types of apples, red and transparent. After I asked about her if I could have some of her apples she thanked me for reminding her she needed to make applesauce and preceded to pick them all. :0(

As for the red apples, Heather told me to help myself and I have! She thought the red ones were crab apples because they were so small but they are not. The red apples did not make very good applesauce I am sad to announce. I did skillet fry some this morning and they were OK.
My hands hurt.


I was not satisfied with them so I used the apples to make a Brown Betty. This was better but I do not think I would use them again. The next step I think will be the dehydrator I got off Freecycle and have yet to use. Sounds like an excuse to try it out.  The apples are super hard so apple rings strung in the basement is out.

Fried apples were good.
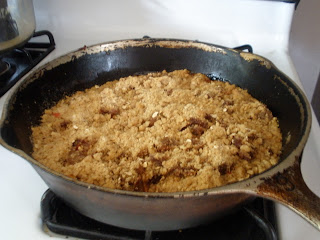
Brown Betty! 

I know I am rambling and whining about these apples! I am very happy we have been blessed with apples. The children are thankful because I am cooking again. :0) ( I do not cook much in hot weather.)  I am going to continue to explore my options and keep you posted!
** Make sure you check out the notes below the recipe.**

CROCK POT APPLEASAUCE


12-14 apples of your choice
1 C apple juice
1/2 salt
Cinnamon
sugar in the raw or brown sugar

NOTE:
The apple measurement is NOT approximate. I filled my crock pot to the top. It might take more or less for yours.
When the crock pot was half full, I heavily sprinkled sugar in the raw and cinnamon over apples. I did this again once the crock pot was full. Mix salt into apple juice then pour over apples. Cover and cook 4 hours on high or 8 hours on low. If you are cooking through the night,  make sure to place the heat on low. You can actually burn your apples by keeping them on high too long. Then you will arise to a horrible smell and crock pot to clean.
If you are fast cooking, still keep an eye on your apples. After 2 hours stir apples. I wanted the apples on the top to make it to the bottom. You can tell how your apples are doing by trying to squishing apples on the side of the crock pot. If you are cooking these through the night, no worries. Stirring is not necessary.
These apples were heavenly to awaken to! I served scrabble eggs, bacon and toast broiled in the oven. My Grandma would be so proud. The kids loved it!
For those living in West Virginia and further South, watch for little June apples in Mid-June in the west they are called Shamrock apples. These are the best to fry with a little butter, and bacon grease. It is the closest thing to Heaven I will ever eat. :0)
May your table be bountiful of old fashion yumminess!
Love~Blair

Monday, September 12, 2011

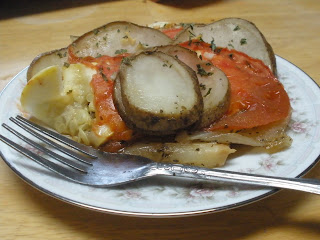
Vegeterian Ratatouille

My Mom LOVED Martha Stewart! She loved trying her fancy menus, create her holiday tables and decorations. No holiday was too small to make grand! 
I never thought I would be one to read a Martha Stewart magazine. However, I absolutely love the Martha Stewart Whole Living magazine. Thanks to Frugal Girls I was able to snag a free year subscription.
The September issue is all about super fruits and late summer veggies. Flipping through the pages I came across this beautiful picture of an absolutely divine looking dish. I knew that I wanted to cook it for dinner tonight! So off to the grocery store for the wonderful ingredients.
This dish was so simple to make. The cooking time was forever! Not really, an hour but it smelled sooo darn good while baking. Hope that you enjoy this vegetarian ratatouille. I served the ratatouille with fresh green beans and sweet potato fries, spinach salad and fresh peaches for desert. According to my daughter Heather, my vegetarian in residence, "It rocks!"
For some reason there was a month delay in posting this recipe and for that I apologize. I think it was because summer finally came to Seattle and it was just too darn pretty and warm to stay in and cook! Add to that Heather heading back East, Joseph getting ready for school and sheer laziness.
Now that cooler days are on the horizon, the trees are beginning to warm up for their brilliant color show, now is a better time to share with you. It would be so easy to short cut the prep by dicing everything the night before. Remember to stick your potatoes in water so that the will not turn color. When you get home put it together, pop it in the oven, While it is baking you have time to go through the backpacks, snuggle with the one you love, throw in a load of laundry, or just unwind. Sounds great to me!
On a personal note, I miss my resident "vegetarian". She is in her own kitchen creating her own wonderful dishes while at Grad School in West Virginia. <3
May your table be bountiful!
~Blair

Vegan Ratatouille
 2tsp extra virgin olive oil
1 onion, sliced thinly
2 tomatoes, thinly sliced
1 medium yellow squash, sliced thinly
1 medium Yukon Gold potato, thinly sliced
Sea Salt
Black pepper
1 Tbsp fresh thyme leaves, divided
1 Tbsp dried parsley
1 Tbsp dried basil, fresh would be better of course~
3 fresh garlic cloves, minced
2 Tbsp freshly grated Parmesan cheese (optional)

Heat oven to 375 degrees. Heat olive oil over medium, cook the onion until it is tender and golden. About 6-8 minutes. Add garlic to onions and continue for about a minute.
Lightly oil the bottom of a 9 X 13 dish. Layer onions and garlic on the bottom of dish. Sprinkle 1 tbsp thyme and basil on the onions. Layer squash, tomatoes and potatoes. Make sure to over lap veggies. Season with sea salt, pepper, thyme, and parsley. (Add Parmesan Cheese if so desired) Lightly drizzle olive oil of veggies.

Bake covered for 30 minutes. Bake the remaining 30 minutes uncovered until golden brown. (total cooking time 1 hour.

Note:
* I think the next time I make this I am going to parboil my potatoes. For my taste the potatoes need to cook a tad longer. The other veggies were perfect.


Saute onions and fresh garlic.

Leaving skin on potatoes as wonderful nutrients, texture, and vitamins.

Place garlic and onions in the bottom of your dish. Layer potatoes, squash and tomatoes on top.

I only had 2 tomatoes, really needed 3.

So colorful.

I drizzled a little oil, parsley and extra garlic and onions.

Ready for the oven.


Oh my golly I wish you could smell this! But hey you can. Make it for your family today.

Friday, September 2, 2011

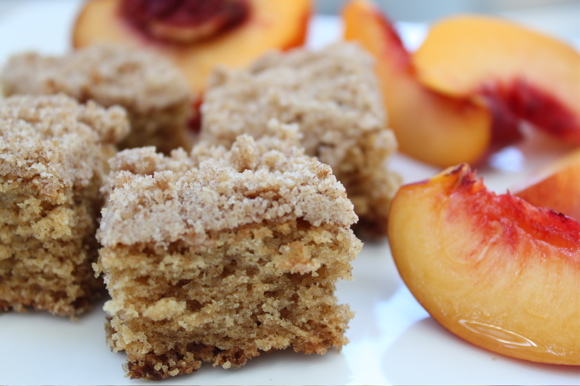
Crumb Top Coffee Cake

I love the look on my children's faces when they wake up and smell luscious yummyness in the air. It just seems to start the morning off right. Their tummies are happy. This in turn makes them happy and we all knows what that means...Momma is happy!
I cannot believe I have not shared this wonderful coffee cake recipe! This was my recipe I ever converted to Gluten/Casein free. Spread a little love and make someone's tummy happy!

Crumb Top Coffee Cake
1 1/2 C    Brown rice flour (adds a bit of nutty flavor)
1/4 C       CERTIFIED GLUTEN FREE oats
1 C          Brown sugar
1/2 C       Earth Balance (stick)
1 1/2 tsp  Baking powder
1 tsp         Cinnamon
1/2 tsp      Salt
2/3  C       Almond Milk (rice milk can substitute)
1               Egg, beaten

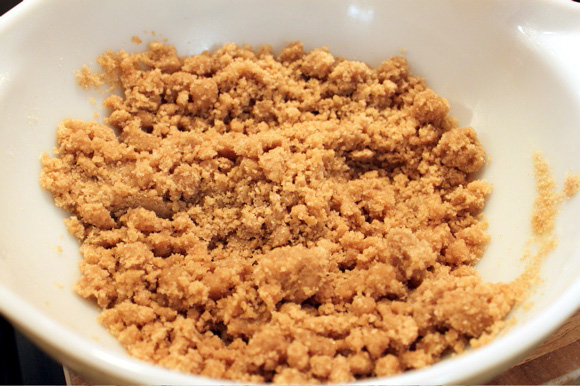
Combine the sugars, oats and flour, cut in earth balance until it resembles course crumbs. (I use my hands to mix, I think it is easier than to "cut" EB in with knives.) Reserve 1 C for topping. Add baking powder, cinnamon, and salt. Beat egg and mix with milk. Add to dry ingredients just until moist.
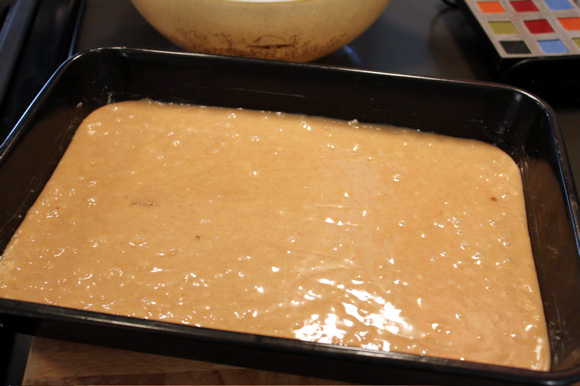
Por into a greased and floured 8-inch square pan; sprinkles with reserved topping crumbles. Bake at 375 degrees, 35-40 minutes. Enjoy!

Notes:
* Instead of flour I use brown sugar, Gives cake a nice crunch on the outside.
* If you are using a dark pan or dark glass pan reduce the heat to 325 degrees. You might need to bake a    few minutes longer.
* this recipe can be made omitting oats. No change in the rice flour amount.
* I have made these into muffins. check at 20-25 minutes depending on how fast your oven cooks.
* I have mixed it up a bit and added 1/3 C of Enjoy Life mini chocolate chips
* Peanut Butter and smashed banana's are a great side dish.
* 1/2 C pecans or almonds can be added. Takes this coffee cake to the next level!
May your table be bountiful!
~b